 When a baby appears in the house, every mother wants to surround him with warmth and care as much as possible. And since a new family member spends most of his time in a dream, it is important to ensure a comfortable and healthy sleep. Of great importance are bedding, namely pillows that support the baby’s head on a still fragile neck. Is she needed? Is it possible for mom to sew it on her own, without violating ergonomics and inherent functionality? Read about it below.
Does a newborn need a pillow
 If we turn to the origins, children from birth did not put special pillows under their heads, but managed a four-fold diaper. But we should not forget that the ecology of some 50-70 years was much cleaner, people were healthier, childbirth took place in a natural way, almost without auxiliary means, and healthy babies were born, without pathologies of the cervical spine in particular.
IMPORTANT! Currently, the number of children with malformations of the cervical vertebrae is growing steadily. The reasons are not only violations in the process of fetal formation, but also inept behavior of medical personnel in the process of obstetric care.
To correct such problems, pediatric surgeons most often recommend an orthopedic pillow. Due to its shape, it supports the baby’s head, limits the amplitude of turns and unloads the cervical spine. An ordinary, quadrangular pillow is not suitable for several reasons: a child’s skull does not form immediately, the bones look more like cartilage, and when the baby sleeps on one side or is rigidly fixed, with emphasis on the back of the head, the structure is deformed - a flat back of the head, asymmetry of one side and so on. Violation of the natural position of the vertebrae leads not only to osteochondrosis and early scoliosis, but also to problems in the development of the nervous system.
But there is also an opposition opinion, which some pediatricians adhere to. It is stated that nothing can be put under the child’s head until they reach the age of one. After all, the baby tosses and turns, the pillow moves, and the head takes an arbitrary position. And for babies, this is a threat to life at all - having buried their faces, the baby may suffocate.
IMPORTANT! When using an orthopedic pillow, regular parental supervision is required. With regurgitation, there is a high risk of aspiration and the development of pneumonia!
It is also not recommended to use orthopedic pillow models for children under 4 months of age.
The baby should be in a crib without retainers, restraints and other attributes not only under the head, but also around the body. Only perimeter borders are welcome to avoid injuries during sleep. And to raise the head, you should use a small roller, which is placed under the mattress. In this case, the bed is a single canvas, and the child’s head will be at a higher level than the legs, which eliminates the possibility of regurgitation and will facilitate breathing.
IMPORTANT! The "grandfather" method of tight swaddling babies had its own logical explanation. The edge of the diaper was at the back of the head, slightly above the neck, thereby supporting the baby’s head. But modern mothers choose this method of swaddling less and less.
I would like to note that each mother herself knows which of the options is preferable for her child. Rely on the medical opinion about your baby’s health and your sensitive maternal intuition!
We sew a pillow for a newborn with our own hands
The market for children's products offers a variety of different pillows, consider the most popular models:
- Classical It differs from the standard “adult” pillow only in size, but in general, the usual quadrangular pillow.
- Anatomical (orthopedic). Special form and special filler. Most often, latex, rather elastic, does not lose shape and supports the head. Buckwheat husk also has a positive effect.
- Fixing. They include various kinds of rollers, whole or in the form of a tube. Such pillows are very comfortable for sleeping during pregnancy, and are also useful in the process of feeding the baby.
- Decorative. Such pillows serve as decoration, the child does not come into contact with them, so the options for decor and fabrics used can be absolutely any. These pads are useful for beautiful instagram photos!

Material requirements
It is best if the pillow for sleeping a child is made of natural fabrics such as linen, cotton, calico, teak. They let air through, do not cause allergies, are pleasant for the baby’s delicate skin. Caring for such fabrics is also quite simple - they can be washed at high temperatures, steamed with a hot iron.
IMPORTANT! For the base of the pillow, you can choose a denser fabric, for example, linen. But the pillowcase can be more tender - flannel or cotton.
You can fill the pillow with a natural filler, such as goose feathers, swan fluff, sheep or camel hair. But do not forget that these excipients can be strong allergens and cause shortness of breath or edema.
Synthetic fillers include sintepon, holofiber, latex. They are lightweight, breathable and do not cause allergies. An important plus is their availability.
We make a pattern and sew an ordinary pillow
Any thing begins with a pattern. In order to cut a pillow for a child, you will need the following tools:
- selected fabric and filler;
- ruler, pencil, scissors;
- tailor's chalk or bar of soap.
 Cutting can be done immediately on the fabric, because it is a rectangle about 40 * 20 in size. Fold the fabric inward, iron it with an iron. It will be better if the fold line coincides with one of the long sides of the pillow.
Draw a rectangle, make a small allowance around the entire perimeter of the pattern. You can cut the details. Sew the details, leaving about 5 cm un sewn.
Turn and fill the workpiece with the selected filler. Sew the remaining section with a secret seam. The pillow is ready!
ATTENTION!A pillowcase for such a pillow can be sewn similarly, having slightly increased the size. Since the product is intended for infants, do not use zippers, buttons and other solid elements.
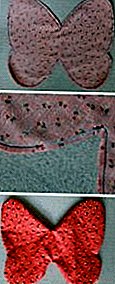
We sew a butterfly pillow
The pattern is based on the trapezoid:
- On a piece of paper we draw the first side of the figure - a vertical segment 17 cm long.
- Another line is drawn perpendicularly from the bottom, to the right by 11.5 cm - the base of the pattern.
- From the top point we postpone another perpendicular, but already 14 cm long. The ends of these bases are connected.
- From the lower point of the original base, lay up 4 cm, and then 3.5 cm - the center of the circle, which will be under the head of the child.
- From the center we draw a circle with a diameter of 7 cm. From its center we draw a perpendicular to the first vertical line until it intersects with the second side of the figure - this is the most curved point of the butterfly wing.
- We connect this point with the corners of a smooth arc.
- We extend the shape of the wings - each base of the trapezoid is divided in half, perpendiculars are drawn from the obtained points outside the plane of the workpiece, set aside 1.5 cm.
- Seamlessly connect these points with the corners of the figure. Next, you can cut into allowances.

It is very convenient to sew a pillow from pieces of quilted fabric. Their thickness will be enough for the central circle, and about 100 grams will be needed for the wings. synthetic winterizer. Also, calico or cotton fabric is required for the front side.
ATTENTION! The pillow template can be drawn by hand. To do this, fold a sheet of paper in half, set aside half the length of the future product from the fold line, and outline the shape of the wings. Having determined the center, mark the semicircle.
Fold the selected fabric face in. Circle the resulting pattern, leaving a seam allowance of 1-1.5 cm. Mark the center circle on the fabric. Chip off the fabric with safety pins and you can cut out the details!
We do the same with quilted fabric. You will get 4 identical parts. Fold in pairs - the wrong side of the cotton parts in contact with the front side of the quilted fabric. Sweep each pair between each other, and then the two resulting parts, with the cotton side inward. Sew on the typewriter along the contour, leaving a small area for filling. Turn out.
REFERENCE! To ensure that the workpiece is well twisted, cut the allowances close to the seam, but without cutting it. Pay particular attention to places where the fabric is curled.
Sew the center circle. Add the selected filler to the wings. For convenience, you can use a sushi stick. Sew the remaining section with a blind stitch.
Pattern and sewing pillows in the shape of a bear
 Animal pillow models are very popular. The pillow pattern in the form of a teddy bear is easy to adjust based on the basic pattern discussed above. Just round the edges, removing the unnecessary bend in the center.
Transfer the pattern to the fabric, cut out the details in duplicate. For the ears you will need 4 blanks. We sew them with the front side inward, leaving the base not sewn up, we turn it out. Lightly fill with padding polyester. Sew the finished ears to the top of one of the parts. Further, the process is similar to making a "butterfly". You can decorate the pillow with sewn felt elements, they are safe and will give the finished product a mood!
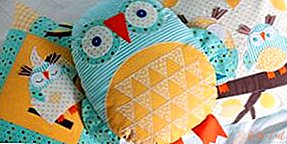
Owl shaped pillow for newborn
Detail - the base is cut in duplicate. To one of them, eyes, a beak, a bow or any other decor are sewn onto the front side. At this stage, you can give free rein to imagination and come up with your hero! Then we proceed according to the debugged scheme described above. Thus, you can make some wonderful options for baby pillows for your baby or please with a useful gift from familiar mothers!
Leave Your Comment